Choosing the right font is one of the most important things to keep in mind while designing your blog. But most of us tend to use the default standard and old serif and sans-serif family. One of the reasons of using the standard fonts is that it ensures maximum compatibility with almost any browser but it just has a basic normal look. But after the launch of Google Web Fonts you can use non-standard fonts to give a better look to your blog ensuring maximum compatibility. Google fonts till date have 501 font families and more are being added slowly. Some of them are really cool and awesome which can change the whole look of your blog.
This tutorial is divided in 2 parts. First part explains how to successfully use a Google font in your blog or website and in the second part we will have a very short discussion on why should we use them instead of standard fonts. So lets get started.

Part 1: How to Use Google Fonts?
For the purpose of this tutorial we will use a Google font in a blogger template but the procedure is almost same for other platforms.
Step 1: Go to Google Web Fonts and choose your choice of font and click Quick-use. For this tutorial we will use Lobster as our font.

Click on Image for full size
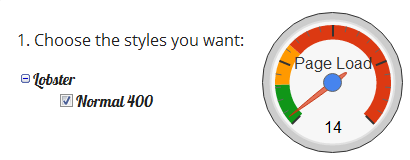
Step 2: Choose the different styles you want for that font like bold, italic, etc. Lobster font only has the normal style but it doesn't matter much. Make sure that the impact on page load time stays in green preferably below 30. If you add more styles or use more Google fonts, then your blog may load slowly.
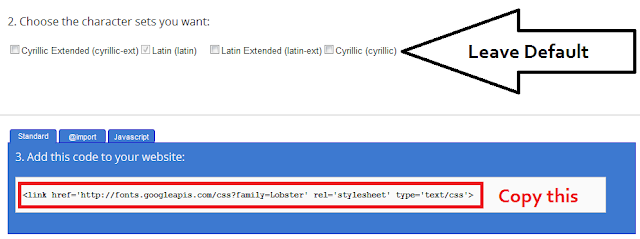
Step 3: After choosing the styles scroll down and you see a line of code. Copy that. You will also have an option there to select the character sets but just leave it to default. Do not close this window or tab, we will need it afterwards.
Click on Image for full size
Step 4: Go to Blogger.com -> Template -> Edit HTML -> Proceed.
For old interface go to Design -> Edit HTML
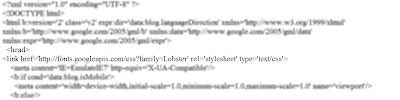
Step 5: Press Ctrl+F and search for <head> tag. Just below that tag paste the code you just copied in Step 3. Now wait, don't save the template or it will give you an error. Right at the end of the code you pasted, replace '>' with '/>' without quotes and save the template.
Click on Image for full size
Step 6: Go back to the Google font window or tab that left open in Step 3 and right at the bottom you will find font-family. Copy that and use it on the text or section you want you want to use your Google font. Now check in your browser and you will see an awesome display of your text different from the traditional fonts.
Part 2: Why to use Google Fonts?
Now comes the time for a little chit-chat on why we are taking this headache to use Google fonts. Frankly speaking it is a headache if you don't want your blog to look cool, awesome and different from other blogs. Traditional and web safe fonts may give a traditional look to your blog but Google fonts will standout your blog from other blogs. Now, you will say that traditional fonts are web safe and do not have any compatibility issues but my friend, Google fonts are hosted on the web and can be displayed in major browsers like Chrome, Firefox, Safari, Opera and Internet Explorer even if the user do not have the font installed on his/her computer.
Another reason to use Google fonts is that it is SEO friendly as the text remains text and is not seen as an image by crawlers. Also most of the Google fonts are light-weight and won't slow down your blog load time if you choose them wisely.
Conclusion
I guess you are now ready to use and play with Google fonts to beautify your blog ripping the traditional font families. If you have any problem in implementation then feel free to ask and do let us know what do you think about Google fonts and are you going to use them in your blog? We are waiting to hear your thoughts. Cheers :)


nice
ReplyDeletethanks for posting ..........
nice
ReplyDeletethanks for posting ..........
how to use this fronts ...
ReplyDeletepls say deeply